Saturday, December 31, 2011

How to make text in Adobe Premiere Pro.

Now, i once taught you how to make text in windows movie maker but when you do it in Adobe Premiere Pro , It'll be magical, because there are so many features on making text in it.

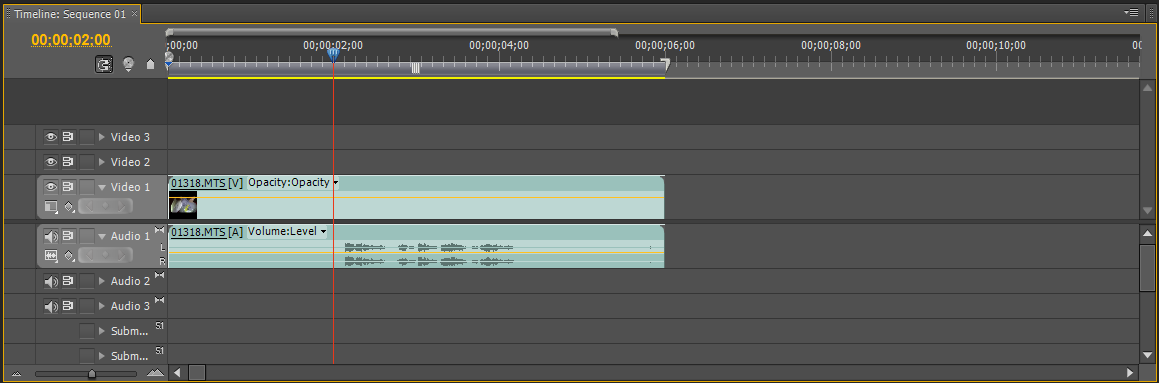
First, open your project:


Now click on Title at the top:


And then they will give you a few options so click on the first one that says ''New Title''----> ''Default Still''


And then this will show up:


Now , lets start with the title tools at the top left corner of the window:


Now , you have the black square at the top which has the arrow in it , now this arrow is used to move text , so you don't need to use it before you make text.

And now next to it is the yellow square which has the rotational tool in it , like the arrow, it has no use before you make the text.

Now, you have the white square  with the most important tool in it. And to make the title just click on this T button and click on the title preview :


Now just type in what you want, and you can use the arrow to move it around and the rotational tool to rotate it.


Now , lets go back to the tools:


And then you have pink square with the title with the Downwards arrow on it, now with this you can type title downwards.

And then you have the white circle with the text box, now you click on the text box and then click on the text preview , and then you type text in the box , and you can click on the arrow at the top to expand the box.

And you can also use the downwards text box in the pink box which is the same like the text box but downwards. And you can also expand and move it with the arrow.

And then you have the oblique text in the green and blue circle, and with this tool , you can mask a text box in your way , now to do this  just click on the tool and click on the preview text , and then it'll show a point on it and then click on another place on the preview and it'll show a line joining these points and then you can keep on creating points and then joining them all together to make a weird shape box where you can type text in and it'll look very odd but cool.


And then you have the tools right below it :

You have the masking tool in the blue circle  , and with it you can do exactly what those oblique texts can do and the masking tool with the negative sign right above it , is used to remove masking points and the masking tool with the positive sign right above  is used to expand and change the shape of the line joining two masking points and the tool in the light green circle is used to expand a line in the circle.

And then you have the shapes which is very simple , all you have to do is click on a specific shape and then click on the text preview and easily expand it.


Now when you make a title and select it , you are able to change the font by looking above where you have a number of fonts and you can also make it bold , italic , bold italic .... And you also have the font size right next to the font box and you also have the Kerning which allows you to make spaces between the characters of the title you wrote. And you also have the alignment which can be center , left , right , justify ....

And then you have the title styles which is the funnest part , now each title style has it's own font , color , font size,aspect... and you can add a specific title style by just selecting the title you wrote and click on the style.


And then you have Title Properties which include Transform ,Properties, Fill (Fill with color) , and strokes.

Now , in the transform , you have opacity for the title , and the x position and y position , now this means moving it right and left which you can easily do so with the arrow tool . And then you have the width which is simply how much you want its width to be and how wide you want it to be which you can also do with the arrow tool.  And then you have the height where you can change the height for the text or how tall it is and you can also use the arrow tool for this. And then you have the rotation which is just easily rotating the text which you can do with the rotational tool right next to the arrow tool.

Then you have the Properties which includes the font family which is basically the font of the title. And the font style which is bold , italic.... And you also have the font size , and the aspect which is basically the same as the  width. And then you have the kerning which is how much space you want between the characters of the title you wrote. And then you have the tracking which is the opp. of kerning. And then you have the basic shift which if you are writing a paragraph, will let you make space between the lines of in it. And then you have the slant , and it's easily how oblique or italic you want your title to be . And then you have the small caps , which you can check if you want your title to be fully capital.

And then you have the distort which is used to change the way the text is written.

And then you have the fill and in it you have the fill type, which can be solid or linear gradient and the Radial Gradient ( Mixing 2 colors ) and the 4 color gradient ( mixing 4 colors) .....  Now you have the color , which is basically the color of the fill and the opacity which is the fill opacity.


And then you have the Strokes which is inner strokes and outer strokes and strokes are like title outlines. And then you have the shadow which is easily just adding a shadow to your title.


And when you are done editing your title , just exit it by clicking on the x button ,and it'll show up in the project , and you can easily just drag it into the timeline.


And this is just the basics and the most important , if you want me to go more into details next time, just contact me at Karims27@hotmail.com

Thanks for reading this blog post
-Karim

Friday, December 30, 2011

I have a new video on Youtube : How to be a nerd!

How to cut your footage in Adobe Premiere Pro CS4!

Now , the whole point of an editing program is to cut your footage into parts and remove the bad parts and keep the good parts.

Now , the first thing you should do is import your footage , now first go to Adobe Premiere Pro , click file , import , or you can just right click on the Project and click import :


Now , just click import and choose your footage and then it'll show up here :


Now , there will also be a preview at the top with the video frame rate and resolution.

Now , as you see , there are 2 screens in adobe premiere pro , now if you double click on your footage it will show up in the first screen which you can edit in:


Now in the first screen , you can choose in points and out points for your video , that means where your video starts and ends . Now , to make an in point , make sure to select the first screen , until there is a thin orange line on it:


So , yeah when you select it , You can drag that little blue point so you can play your footage, now to choose an in point , just drag the blue point to the part of the footage where you want it to start and click on I on your keyboard , and this is how it will look:


And then , you can drag the blue point to where you want to end your footage press on O on your keyboard , and this is how it will look like :


And then , to drag it to the timeline , just press that button which i drew a circle around.

and then it'll show up in the timeline and in the second screen like this:


You can import more footage and make an in point and out point for it and then put it next to the first footage and that's it.
You can also cut footage buy using the cutting tools in the corner :


Remember for more information , contact me at Karims27@hotmail.com

Thank you for reading this post
-Karim

Thursday, December 29, 2011

How not to need to render your footage in Adobe Premiere Pro if you have no effects on it.

Now, lets say you want to open a new project for a new movie.
Now, if you are shooting in HD , it's going to be much different than shooting in SD.


Now, i will show you how to make your own project settings that work perfectly for the camera you are shooting on. Because for example, if your camera is shooting with a frame rate of 24 frames per second(Cinema) and you choose a setting which includes 30 frames per second , you are going to have to render your project even though you have no effects on it. So, it's completely a waste of Hard Drive Storage and computer power , and off course a huge waste of time.

Now  when you open premiere this is what will show up :


Now , just click New Project to make new settings or you can just open an existing project by clicking on ''Open Project'' , but to make your new settings for your camera , click on New Project, and this will show up:


Now over here , the only thing i suggest you do , is change the Capture format to HDV or DV depending on your camera and when you click on scratch disks , this will show up:


Now , in here , you can pick what you want your project to be rendered in . For example , i like to render my project in Local disk D because it has more space , so i recommend changing to the disk with a higher capacity , now to change the disk , just click browse , and pick the disk you want but remember to pick it for all of the following : Captured video; Captured Audio; Video Previews; Audio Previews.

Then , name your project and press OK, and this will show up :


Now, this is the important part . When you have a project , you can have several sequences , but each sequence has different settings. For example , my camera is an AVCHD camera that shoots in 1080i and i shot it with 30 frames per second which is equal to 29.97 frames/second so i pick that setting.
Now , remember to check the frame rates on your camera and the resolution to pick the specific and right setting.
And then  hit OK , so this will show up:


So, then import your footage that works with your settings, and then insert it in your timeline and this is what you will see :


Okay , now what you see is a yellow line above your footage instead of a red line . This yellow line makes things smooth so you can play your footage in real time. But if you see a red line , that means your settings don't work with your footage and it will be very hard and rough to view your footage.


And that's all, make sure to contact me at Karims27@hotmail.com.

Thank you for reading this post,
Karim

Wednesday, December 28, 2011

How to export your video in HD in the lowest size possible in Adobe Premiere Pro CS4 or CS5.

Now, in this tutorial, we are not only going to use Adobe Premiere Pro to encode our video. We will also use Handbrake: A very simple and great converter.

Now, lets say you are done editing , and when you are done , just click on File--->export---->Media:


And by Media , they mean Adobe Media Encoder which comes with Adobe Premiere Pro.

And when you click on Media , in a few seconds , this window will show up:


Now , at the top of the window you have Source/Output , so click on Output. Basically, Output will give you the quality of the settings you gave, so the output is how your video will look like when you export it and source is the quality that comes from the camera you were shooting on:


Click on Output


Okay , now head to the right where you can tweak with your export settings :


Okay , now these are the settings that i use that produce the best quality for me. Many people would disagree but this is what i use and produces quality that is one of a kind.


So:

Format: FLV/F4V
Preset: F4V-HD 720p Flash 9.0.r115 and Higher.
Comments: Write anything you want.
Output Name: Where to save your movie and what to name it.
And remember to always to check on Export video and Export audio.
And in the Video tab:
Check on Resize video.
And the frame width : 1280
Frame Height: 720
Frame rate: 29.97
Field Order: None(Progressive)
Profile: High
Level: 4.1


And then we have the bitrate settings , which is probably the only thing that changes quality. The less the bit rate , the less the quality and file size. And the more the bitrate, the better the quality and higher the file size. The bit rate i find which is the best is :

Target Bitrate: 6 Mbps
Maximum Bitrate: 9 Mbps


And in the advanced settings , you have Set Keyframe Distance, so just uncheck that.


And i recommend not changing anything in the audio because it's already perfect.

So just click Ok.


And then they will take you to Adobe Media Encoder and this window will show up:


And then just click on ''Start Queue'' , and wait for it to finish and then go to the file you saved it to.

And then open Handbrake and convert it into a smaller file size that it will be so easy to upload to youtube , and here is a tutorial for Handbrake : http://teachingyouaboutyourpc.blogspot.com/2011/12/how-to-convert-very-large-video-file.html

And that's all , for more information , contact me at Karims27@hotmail.com


Thanks for reading this blog post,
-Karim

Tuesday, December 27, 2011

How to prevent hackers from hacking your email.

Now, you probably have an email which you used to register your youtube account with it and you also probably have an adsense account on it too. Now, if you have all those stuff and you get hacked , everything will go away.

Now, here are some tips i will give you some tips  to keep your email safe:

1) First , i recommend getting a gmail account instead of hotmail,yahoo, ... because gmail is much safer and has so many tools to protect your email.


2) And then you should create a very strong password , and make sure to include in it letters ,numbers , some capital letters to make it as strong as possible.


3) You should put a secret question , because if you do get hacked , you can put ''forgot my password'' and easily type in the secret answer to the question and then you have the option to create a new password. However, that won't solve everything , because when the hacker is in your account , he can change the secret answer.

4) Put in at least 2 alternate email addresses , because if you can't sign , you can just click on ''forgot password'' and then you can send something to one of those alternate email which you have to sign in to that will let you change your password.


5) Use Firefox  instead of internet because it's much more safer.

6) Google has something called 2 step verification, which takes signing in to the next level. You add your number to your google account and when you sign in to your google account , and when you write in the password and username , they will send a text message to your phone that has a code that you will write in. That way , your account will be saved forever.


And that's it. For more information , contact me Karims27@hotmail.com.

Thanks for reading this post,
-Karim

How to gain traffic onto your website.

Now, there are bloggers that suffer trying to gain traffic. Now, honestly nobody really cares what happened in your life (What you ate for lunch,  when you played football...).

You have to make something that will teach people something. For example, i made a blog about computers so i can teach the people that are new to this technology.

Because for example , when people search something on google , they are going to type something so they can learn.

1) So, the number one thing you should write about is something you are good at , and something that will teach your audience.

2) You have to get into the most important search engine which is google , now to do that , just go to google webmaster.
And then just add your site to it, then your site will be on google but it won't  mean that you are going to be the top , you will be barely at the last.

3) And you must always publish posts frequently , that will make a big difference , for example , my traffic is starting to evolve  because i am posting at least 2 times a day.


4) Make sure each post has a difference of topic . What i mean, you have to write about different topics. For example, if you write about computers, you have to write about different softwares .

5)Add pictures to your posts so you can show up in google images.

6) Use social media : Twitter, Facebook , Digg.(But don't  spam)


And that's all , but remember traffic won't be made overnight , but if you use these steps in the next 1 or 1 and a half years , you will make some great traffic.

For more information , contact me at Karims27@hotmail.com

Thanks for reading,
-Karim

Monday, December 26, 2011

How to check your website page rank in the whole web using Alexa.com.

So, as you know there are an infinitive number of websites in our online society, did you know that each page has a rank. Did you know that you have a rank too. And in this tutorial , i will show you how to check your rank.

Now, there are many sites where you can go to to check your page rank, but i find Alexa.com the BEST
And i just want to say thank you to its developers for creating such an awesome site.

Now, first you have to go to Alexa's website.

Now, this page will show up:


Now, when this page shows up , under the Discover success title , you have a search engine.
Now, in that search engine , just type your website/blog URL,like this :


And then they will give you your site information which includes site rank and number of backlinks , and backlinks means how many sites gave a shout out  to your site in their posts.


And that's all you have to know , contact me for more information at karims27@hotmail.com


Thank for reading this blog post


-Karim


How to make a clicktotweet link for a specific link like your youtube video or website.

When you get viewers on youtube , and then you ask them to tweet your video , they might be really tired to copy the link , open twitter, and paste it, or they are probably lazy.

Now , there is an easier way to share your video or site or blog , and it's so easy that it can be done it 2 clicks literally.

And this way is called a Clicktotweet link.

Now, off course , you should know what this means.

A Clicktotweet link is a tweet you make that can be re tweeted once the link is clicked.


Now, to create this link , you are going to have to visit this site http://clicktotweet.com/.

Now when you visit it , this is what you will see :


Now first , you have to write the tweet that you want your link to have in .

And then click Generate Link!

And then they will give you the URL , and they will also show you the preview so just copy paste and post it any where you want. And when people see it , all they have to do is click the link and then a window will show , and then they press tweet. So yeah , literally 2 clicks.


And that's all , for more information , remember to contact me at Karims27@hotmail.com.


Thanks for watching this post,
-Karim

How to create pages in Blogger!

When you go to a site, you see about 5 pages in it that include about me , home,......

If you look at my blog , you can see a lot of pages:


Now, as you see , pages are very important.

When people visit your site to learn about the basics of computers, and if you didn't make any pages, i am 95 % sure , they aren't going to scroll down back to the beginning of your blog to learn because you probably made a lot of blog posts, so with the help of pages , they won't be confused and they will see what they need right in front of them. Remember , in the pages , you always have to put in information that is 100 % relevant to the purpose of your site.( For example , if your site is about teaching people the basics of computers, all you have to write in the pages is the basics of computer and not the accessory programs of it.)

Now, in this post , i will give you the instructions you have to go through to make pages:


First, go to your dashboard, and click Edit Posts:

and then a page with the list of posts you made will show up , but above the list there is a button ''Edit Pages'', so click on it :


When you click edit Pages ,there is a button '' New Page'' so click on it :


And when you click it , they will ask to type in the page title and description :


So you type everything in and then you just click publish.


Now if you created a number of pages , you can organize which comes first, but the home page is 
the page your visitors will automatically see when they visit your blog.


Now, to organize the pages, go to the Design---> page elements and then click on the Pages and then when you are there this window will appear with all the pages your created, and then scroll down to page order:


And then , all you have to to organize the pages is to drag and drop and that's all.


For more information about pages, remember to contact me at Karims27@hotmail.com

Thanks

-Karim

How to check your Blogger Blog Statistics!

Now, maybe you have a blogger, but you want to know how much traffic you have gained during this week or during last week or from the time you started your blog until now or in the last 2 hours.

Now, Blogger offers a very useful feature in the settings called Stats (Statistics) (Sorry for censoring but i don't think my stats are important to know and they are private)


Now, in the Stats you have 4 Sub tabs.

1) You have the the overview tab which shows the summary of all the 3 other sub tabs : Posts ; Traffic Sources ; Audience. Now, offcourse you can pick whether you want to see the statistics for now; Day; Week; Month; All time.

And in the the overview sub tab you have Amount of views for today; yesterday; last month; All time.

And you have your traffic sources. Traffic sources is when they show how your viewers were led to your site.

"Don't click on any unfamiliar URLs!"


And you have your Posts views which shows how many views you have for each post in that specific time interval.

And then you finally have your audience which is the most interesting which shows you your viewer's operating system and browsers and then they will show you your viewers country(Location)

(To see what operating systems and browsers that your viewers use to check your blog , you have to click the audience tab which isn't in the overview that , and it's not in the overview tab)

And that's all you have to know about your blogger stats.


For more information , contact me at my email Karims27@hotmail.com

Sunday, December 25, 2011

How to use Movie Maker 2.6 Tutorial.

Last time , i showed you how to use Windows Live movie maker which is the newest version.
But, as i said , there are people that prefer the old one because it has the timeline.

Now, i will show you how to use the old version of windows movie maker , but if you know how to use the new one , you will have an idea on how to use the old one.

So , when you open Windows movie maker 2.6, this window will show up :


Now, first , we are going to have to know how to import video or/and images and/or audio or music.

Now, first , you are going to have to look under the capture video :


Now, to import video , all you have to do is click on the import video button and then import what you want.

And the Same way for pictures and audio.

Now, when you import all you need , they will show up in your collection :


And when it shows up in the collection , you can drag it onto the timeline , and when audio is in your collection , you drag it onto the audio track:


And then you can play your whole project using the video player on the edge.

However, we are not done yet, we also have some accessories we can add to it, and these accessories show up under the Edit movie tab:


You can add video effects by click at the video effects button , and then it'll replace the collection with the video effects tab like this :


And then you can just drag some of these effects onto a clip in your timeline.


And then you have video transitions , when you click on video transitions , it'll replace the collection like the video effects .. and video transitions is like a cool effect  between two clips, and there are a number of transitions:


And when you are done with transitions ,  you can add text to your project , which can be title or credits. Title is for the beginning of the video and credits is for the end:


And when you click at it , you get this window, where they show you where to put the title , and you can add text on the selected clip.


And you can also make an auto movie where movie maker will do the editing for you.


And to export your project, you look under Finish Movie:


And when you are done editing , you can save it to your computer by clicking on save to my computer, and this will show up :


And when this shows up , remember to name your movie and keep on picking next until the exporting is finished and then you can preview your project by going to the place you save it and watching it in windows media player.


And that's all , you can learn about how to use windows live movie maker : http://teachingyouaboutyourpc.blogspot.com/2011/12/how-to-use-windows-live-movie-maker.html

And for more information , contact me at Karims27@hotmail.com


Thanks for reading this blog post,
-Karim

How to add a youtube video (with youtube video player) to your website(HTML)

Okay, a lot of people know how to copy a video to a website , and they think that just copy-pasting the URL will do the trick. It will... But did you know that you can get that youtube video player with the video onto your website?

This is called copying the HTML code of that specific video and putting it onto your site.

First, go to that specific video on youtube.

For example, my video :


Now, click on that share button(below the video) and this will show up :


Now , the URL of the video the ''http://youtu.be/ed03....'' And you can copy this URL onto any site and it will just give you a link but the HTML of the video which is ''<iframe width="640" height="360" src="http://www.youtube.com/embed/ed03TkSJV-Q" frameborder="0" allowfullscreen></iframe>'' is when you can add this to your website and then the Video with the video player will show up in your site.

And you also have an option to pick how much do you want the video player's size. Just look at the boxes at the bottom of this picture which have the sizes onto it (640 x 360; 560 x 315)...... Now when you choose a different size than the default size(640 x 360) the HTML code will change. And you can also have a custom size.


Okay, now ,you have to copy the HTML code onto your website. But if you are website doesn't have like a HTML box , this won't work.


I will give you an example, Blog post in Blogger:


Now, you have to click on edit HTML and then you will have to paste the HTML of the video , and this is how it will look.


Now, when you post the given video ,  A black rectangle will show depending on the given sizes you gave and when you click on publish post , and go to your blog , you will see that video with the video player as a blog post.


And that's all , but the video player doesn't have to be a blog post , it can be in your template so it'll stay there permanently , i'll will make a tutorial on that soon.


Thank you for reading this blog post. Remember, if you need more information , contact me at Karims27@hotmail.com


-Karim

Saturday, December 24, 2011

How to decrease loss of battery life of your computer or increase its performance by increasing it.

Now, as most of you know , there is no way you can increase battery life, but you can decrease the loss of it .

For example, you are in the middle of no where ,  you have only 6 percent of battery life and you have to make a very important research. Well here is something you can do to use this 6 percent for about 20 to 30 min. which is magical.

Now, many people know computer performance , and the higher the performance , the higher the decrease of battery life. And the lower the performance , the lower the decrease of battery life.

Now, the computer performance can be lowered automatically by clicking the battery button on your task bar and choosing ''Power Saver'':


Now, in this case, performance means brightness and speed , and when you pick power saver , it will decrease the speed and when you click on adjust screen brightness , and make it darker than your current brightness , you can decrease in loss of battery life , and you can darken your screen by clicking ''Adjust screen brightness and this window will show up:


And you just adjust screen brightness and that's it. So by click Power saver and lowering the brightness , you can keep your 6 % battery life for a good time.


However, if you have your computer plugged in and being charged , i recommend going for high performance or balance.


Now, this is all you have to know on how to save battery life and speeding up your computer. If you have more question or in the need of more information , remember to contact me Karims27@hotmail.com.


Merry Christmas!!