As you all know, one of the simplest ways of getting rid of unwanted detail in a video, you just use the crop button in most editing programs but there are more advanced and practical things worth trying in a specific piece of footage.
First, we are going to teach you how to do the basic cropping techniques in Adobe Premiere Pro.
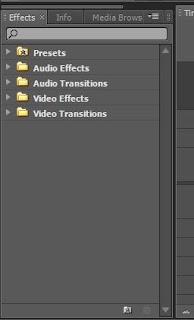
First, open Adobe Premiere Pro and import and drag a video to the timeline of the project and click on the effects tab:
When you are done with that , click on the Video effects sub tab and then click on the transform and click on the crop button to drag it to the video. Then you have to click on the effects control tab of the video:

You can play with the number but there is a much easier way:
You can click on the crop button and select it and then you can play with the cropping on the sequence video:


As you can see , this is very basic cropping but there is a much better and practical way called garbage matte and it's found in the keying sub tab:

You can drag it to the effects control of the video but I recommend you take off the crop effect first not to make it look weird:
There are four types of garbage matte , there is the four point, eight point and sixteen point garbage matte. The more point you got, the more detailed the cropping will be , I will enter an eight point garbage matte into the effects control:

As you can see , there are a lot of options which are much more than the crop and the 16 point has more and 4 point has less and you don't have to go and change the details and numbers. You can easily select it and change it on the sequence video like the crop.
That's all you need to know.
Hope you understood it perfectly.
First, we are going to teach you how to do the basic cropping techniques in Adobe Premiere Pro.
First, open Adobe Premiere Pro and import and drag a video to the timeline of the project and click on the effects tab:

When you are done with that , click on the Video effects sub tab and then click on the transform and click on the crop button to drag it to the video. Then you have to click on the effects control tab of the video:

You can play with the number but there is a much easier way:
You can click on the crop button and select it and then you can play with the cropping on the sequence video:


As you can see , this is very basic cropping but there is a much better and practical way called garbage matte and it's found in the keying sub tab:
You can drag it to the effects control of the video but I recommend you take off the crop effect first not to make it look weird:
There are four types of garbage matte , there is the four point, eight point and sixteen point garbage matte. The more point you got, the more detailed the cropping will be , I will enter an eight point garbage matte into the effects control:

As you can see , there are a lot of options which are much more than the crop and the 16 point has more and 4 point has less and you don't have to go and change the details and numbers. You can easily select it and change it on the sequence video like the crop.
That's all you need to know.
Hope you understood it perfectly.
any other method please
ReplyDelete