Monday, December 31, 2012

CyberpowerPC Gamer Ultra GUA880 Desktop Review and Specs.

    I am going to start making reviews for desktops because what I like is a powerful computer and I want to share this interest with you guys.

I will start with the CyberpowerPC Ganer Ultra GUA880 Desktop which is an amazing super powerful computer that an editor or gamer should get.

Specifications:
1) 8 GB DDR3
2) Graphics Card Ram Size: 1 GB ram NVIDIA GT610
3) 1 TB SATA 7200rpm
4) Processor: 3.6GHz Quad-core

   As you can see, this case is very powerful and can easily process editing softwares like Adobe.
Comment on what you think.

Sony HDR-CX190 High Definition Handycam Review and specs!

    Here with another review. Today, we will talk about the Sony HDR-CX190 High Definition Handycam. It's an excellent camera with a cheap price and with great Specifications:

1) 5.3 MP for images.
2) 25X optical zoom
3) 2.7 inch LCD display
4) 1920*1080 Full HD video
5) Exmor CMOS sensor

   This is a very convenient camera which only costs about 250$ which is great for these specifications.

Buy it here: http://www.amazon.com/Sony-HDR-CX190-Definition-Handycam-Camcorder/dp/B006K551HQ/ref=sr_1_1?m=A3IW2TA4Y0CCX0&s=electronics&ie=UTF8&qid=1357001968&sr=1-1&keywords=Sony+HDR-CX190

Happy New Year Video

I made a video to my youtube friends to say Happy New Year.
http://youtu.be/7uVEsJMDmxo

Happy New Year everybody!!

   I just want to say in this blog post for everybody who is seeing this: Happy New Year!!
What's your New Year Resolution? Mine is to earn more experience and Knowledge in editing, film making and all the talents I like.


Tell me your New Years Resolution in the comments.

Extremely Powerful Laptop: Origin EON17-SLX

  It has been buzzing all over the internet. The Origin EON17-SLX is known to be The extremely powerful gaming/editing laptop. We are going to talk about the specifications:

1) Processor : Intel 3rd generation Core i7 3940XM / 4.4 GHz. Quad-Core.
2) Ram Memory: 16GB
3) Storage capacity: 2(120 GB SSD)
4) 17" screen with resolution 1920*1080
5) Graphics: Dual NVIDIA GeForce GTX 680M - 4 GB


  As you can see, this is a super laptop whose power is unstoppable. However, I don't recommend it unless you are working on High resolution Editing (RAW footage).

Comment on what you think.

You can Buy it on: http://www.originpc.com/Laptops/Gaming/EON17-SLX/Default.aspx?TAB=FEATURES&ACTIVE=TRUE&SYSTEMID=18&idaffiliate=162

Sunday, December 30, 2012

Lenovo Y580 15.6-Inch Laptop

   I was browsing for powerful laptops that would be good for the society that are in need of powerful ones for editing and I stumbled upon The Lenovo Y580.

Specifications:

1) Intel Core i7 2.3 GHz
2) 6 GB ram DIMM
3) 750 GB 5400 rpm Hard Drive
4 )15.6" with 1366*768 resolution
5) 2GB RAM for Graphics card
6) Battery life: 6 hours


 As you can see, this is a very powerful laptop that can be easily used for editing and I highly recommend it.

Link for buying it: http://www.amazon.com/Lenovo-Y580-15-6-Inch-Laptop-Dawn/dp/B009AEPQDI/ref=sr_1_6?ie=UTF8&qid=1356915608&sr=8-6&keywords=lenovo

Transcend 16 GB Class 6 SDHC Flash Memory Card Review

I have had this amazing memory card for a while and I find it very pleasing.  I use it for my Canon camcorder which is the Canon Vixia HF R100 (for which I made a review: http://teachingyouaboutyourpc.blogspot.com/2012/12/canon-vixia-hf-r100-review.html).
The card has been with me for a year and a half.
It is a class 6 memory card which means that the minimum speed for writing data is 6 MB/s.
which is very fast so not lots of lagging can happen.
It has a capacity of 16 GB which can store a lot of footage even for a full HD 1920*1080 like my camcorder.
I highly recommend it and I hope you take my advice into consideration.


New Instagram account!! Follow me @karimsaf!!

  Hey guys. I just got an instagram account. If you are a person who reads my blog, check out my instagram account and me @karimsaf.

Thank you.

How to add lighting to a footage in Adobe Premiere Pro

        You probably always wanted to add a spotlight onto a subject to make a nice cool atmosphere towards your audience. This lighting effect is a very cool effect that can be used in many ways in Adobe Premiere Pro (All versions)

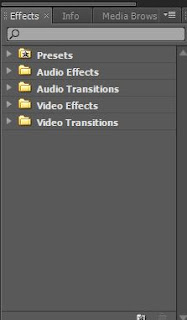
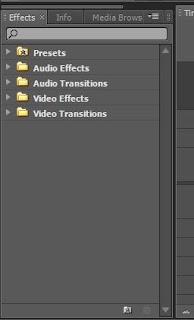
First, open Adobe Premiere Pro and import a footage or image into your project and then drag it onto your timeline. You can then look into your effects tab:


Then open up the video effects and click on adjust , then drag the lighting effect under adjust onto the footage in your timeline. Go to the effects control of the footage and you can see the effects of the lighting effect:


A nice light will show on your video which is light 1 in the control tab. Click on light 1 , to start to play with its position:


To play with its position change the center of it and then you can play with its size by changing its radii (Major and Minor) and then you have its angle and intensity. The focus will increase the light over all over the video. The same goes for other light if you want to add. The light type can give you the chance to add it as a spotlight if you have a show and want to focus the spotlight on the subject. You can also change the light color.


That's the most important part of lighting effects.
Comment on what you think.

Saturday, December 29, 2012

Canon T2i Review and Specifications.

The canon t2i is known to be one the best DSLR cameras in the market and it has been compared with cameras like the canon 7D and it was shown that there isn't much of a difference. I highly recommend such an amazing DSLR camera.


Specifications:

1) 18 mega-pixel with the CMOS sensor.
2) The usual kit includes 18-55 mm for 700$.
3) Full HD movie 1920*1080 .
4) High target bit( About 50) making its video very nice and smooth.
5) Wide 3.0-inch LCD screen.
6) Excellent picture even if it was in a low light room.

Enough has been said. Buy this camera. 


Link: http://www.amazon.com/Canon-T2i-Processor-3-0-inch-18-55mm/dp/B0035FZJHQ/ref=sr_1_1?ie=UTF8&qid=1356788951&sr=8-1&keywords=canon+t2i


Lenovo Edge E430 Review and Specifications!

This a review for another powerful laptop with an excellent compatibility with Adobe Premiere Pro and many other editing softwares.

Specifications:


a) Hard Drive Capacity: 500 GB
b) Hard Drive Speed: 7200 rpm
c) Memory (RAM): 8 GB 
d) Type of Memory: DDR3
e) Processor: Intel 3rd Generation Core i7 2.6-3.6 GHz
f) Display: 1366 * 768 and 14" screen 

I highly recommend this computer for its powerful and it's something an editor should buy if looking for a computer.


How to make LIGHTNING in Adobe Premiere Pro!!

  Many people want to do the next harry potter effects movie with the awesome scary and gloomy theme. You mostly need an effect which generates lightning. This is easily done in Adobe Premiere Pro. I will show you how.

First open Adobe Premiere Pro and take a look at the effects tab:


Then click on video effects and then generate , then look for the effect lightning in the tab and drag it onto your footage in the timeline. A nice lightning will now show on your footage that will start to give some nice motion when you click play.

However, you are going to want to adjust its setting in the effects control tab. Click on the effects control tab to take a look:


As you can see , there are a lot of effects here. On your sequence screen , you have the end points , you can play with the end point by moving them around which will make your lightning longer or shorter depending on  what you want.

Then you have the number of segments. If you have one segment, it will look dull and not so cool. The more segments you add, the more intense. But don't add too much or it will just look ridiculous. Then you have the Amplitude which is how high you want the segments to be. Then you have the detail level which increases the glow in the light. Then  you have the "Detail Ampl..." which makes your lightning more odd and disordered which I don't recommend. Then you have branching which gives your lightning more of branches than just being a few. Then we have re branching which increases the amount of branches that come from branches.
Then the branch angle in which you can adjust the branches' angles. Then you have the branches' height and their number and their width. Then you have speed of the lightning as a whole. Then you have the stability of the lightning. Then you have the fixed endpoints check box so if you check it , the lightning will be perfectly fixed by its endpoint. This is really what's important about this effect. Everything else like the color can be figured out independently.
Thank you for reading.
Comment on what you think.

Adobe Premiere Pro Transitions: Cube Spin and transitions in general.

   In Adobe Premiere Pro, there are a lot of video transitions. I find the most interesting the 3D ones. I am going to make this blog post about the 3D cube transition. I might do more tutorials about other video transitions too.

First, open Adobe Premiere Pro, and drag a footage into the timeline after importing it. You have to add two videos in the timeline to put the transition between them. You can even put one footage and cut it in the timeline to put the transition between the two cuts.
Then take a look at the effects tab. Click on Video Transitions, and then click on 3D motion. Then, drag the effect and add it between the two videos in the timeline. You will have it like this:


Then click on the transition which is the purple colored effect on the timeline and take a look into the effects control.


You can play with the duration of the transition which will really mean how much do you want it to take over the two videos in the timeline. Then you have the Alignment which you can easily change in timeline by dragging the purple effect where you want it to be between the two videos. Then you have those little two screens which are the start and end screens. When you increase the start, then the full transition won't be shown but just part of it and this goes for the end too. You just pick which part of the transition you want to show that acts on the two clips. Then you have the "Show Actual Sources" check box which doesn't effect the video but if you unchecked it , those little two screens will turn into A and B screens. The "Reverse" check box will change the direction of the transition when you check it.

This is all you have to know about Cube Spins. The same goes for other transitions but some transitions have   their own effects with them too in the effects control tab. Like the door transition which is the exact same but they have the border color option in which you can give the door transition a color.
Post a comment on what you think below.

Sony - VAIO 14" Touch-Screen Laptop Specifications

This blog post is about the specifications for the Sony-VAIO 14" Touch-Screen Laptop. I find this laptop very satisfying because of its power and user-friendly qualities due to its touch screen ability.

Specifications: 

a) Hard Drive Capacity: 1 TB or 1000 GB
b) Hard Drive Speed: SATA (5400 rpm)
c) Memory (RAM): 8 GB 
d) Type of Memory: DDR3
e) Processor: Intel 3rd Generation Core i7 2.2 GHz
f) Display: 1600*900 and 14"

As you see, this is a very strong computer however Adobe Premiere Pro isn't compatible with it due to the 5400 rpm hard drive speed which needs a 7200 rpm hard drive speed.

Friday, December 28, 2012

How to add a lens flare on Adobe Premiere Pro

   You have always looked at movies giving a light effect at the corner of the film which really might make you want to do so if you are making a film.
Today, I will teach you how to do so through the editing software Adobe Premiere Pro.

First open Adobe Premiere Pro , look into the effects tab:


Click on the video effects then click on the generate tab and then drag the lens flare effect onto the video that you imported into the project and dragged into the timeline. Then it'll automatically give you the effect:


You might not be very satisfied with the effect due to its position and brightness and etc.
Then click on the effects control tab and take a look at the controls of the effect:


To play with the flare center or position , you can click on the Lens Flare tab and play with it on sequence video. You can then play with it's brightness by decreasing it and change the type which will change it's color and look. Then you can change how much you want to blend it with the video it's on. If the blending was 100, it'll disappear.


That's all for lens flare.
Comment on what you think.

Dell Inspiration Laptop Review and Specifications

You guys have heard about some laptops being weak as being at the bottom of the electronic chain and some at the top being the most powerful. The most powerful include The Dell Inspiration laptop.

Specifications:

Advantages:
a) Intel 3rd generation core i7
b) 2.4 GHz
c) 17.3"
d) 8GB ram DDR3
e) 1TB
f) NVIDIA GeForce GT 650M
g) 64-bit windows 8

Disadvantage : 5400 rpm Hard drive speed. This isn't really considered an disadvantage for people that want gaming but it is for the editors of Adobe CS5 AND CS6.

Leave a comment to tell me what you think!

Thursday, December 27, 2012

Canon Vixia HF R100 Review!!

Hello everybody , I have had this camera for a while now and I have been very interested in it.
It has been with me for about a year and a half and it can't be more pleasant.
What I like the most about this camera is the 1080p HD video (1920*1080).

Other Characteristics:
1) It has a 20x optical zoom which it makes it perfect to take a video of a faraway baseball field or something that is at a great distance from the photographer.
2) It is an AVCHD video with a high target bit (estimated it at 16) which is excellent for good quality video.
3) It has a very good lens (3.0-60.0 mm focal length) that is excellent for making a nice and clear manual focus(blurred image behind unfocused subject)
4) It has a set of effects and transitions that are in the camera.
5) It has an excellent mic. and if ever damaged, the camera has a mic jack which makes it even more efficient.
6) It has a cinema mode effect that takes away bad image giving a good and cinema like video.

Some images shot by the camera:
1)
2)


Wednesday, December 26, 2012

Life of an adjunct professor!!

This is the link for my new video.

This video is about the reality of getting a PhD in English because English isn't a subject that universities are widely demanding even though it's the key to civilization. If you want a career in English , you should also get an MBA(Masters in Business Administration) , this will be good because if you fail English , you can always become involved in economics and start a business.
Thanks for Watching

Tuesday, December 25, 2012

Alienware M18x R2 Review!!

The Alienware M18x R2 is one of those amazing computers that are awesome for gaming and high-end video editing for dslr cameras and more camera with high target-bit.

Specifications:
1) 18 inch screen with screen resolution : 1920 * 1080 pixels (1080p)
2)Processor and CPU : 3.1 GHz Core i7-3610QM
3)Hard drive: 750GB with Hard Drive Speed : 7200 rpm
4)Ram : 8GB DDR3
5) Graphics: NVIDIA GeForce GTX 660M
6)Include Bluetooth

Many people who use this laptop for games like World of War craft and software editing like Adobe and avid said that they loved it.
You can order this on Amazon: http://www.amazon.com/Alienware-M18x-AM18XR2-7111BK-18-Inch-Laptop/dp/B009FX7BF0/ref=sr_1_2?s=electronics&ie=UTF8&qid=1356442516&sr=1-2&keywords=alienware

Adobe Premiere Pro CS6 Review!!

Many people have been interested in Premiere Pro for ages and decided not to like other editing software due to it's amazing features. Well, your likeness of this awesome editing software will increase due to Adobe Premiere Pro CS6. Many people that liked Final cut Pro and Avid are going to change their mind sooner than ever.

1) Even though Adobe Premiere Pro CS5 had the mercury playback engine , CS6 has improved it and made it even faster.
2)Play back by decreasing resolution however this just means that you want to check it. When you hit pause you will see the difference.
3) Different user interface which makes it easy for the user to play around with his timeline.
4)Clear audio meters which is good to visualize the audio.
5)The Project browser which made improvement in which each video can be play backed on a small screen  
6) You have full cinema display to let your entire sequence act like a movie and just be all over the screen.
7) It doesn't stop play back unless you tell it to and you can change effects while the video is playing.
8)Dynamic trim tool
9) The adjustment layer which lets you put an effect on many clips at once without having to go one by one.
10) Stabilizer which stabilizes a clip in vast motion


  There are much more but these are what interest me. These solve a lot of things many people went through in adobe cs5

Leave a comment and tell me what you think.

Monday, December 24, 2012

Dell Inspiron 14z Laptop review!!

Hey guys , what's up. Today, I am going to do a review for the Dell Inspiron 14z Laptop.
I am getting this laptop for Christmas because it's very powerful and excellent to run fast programs.

Specifications:


  1. Intel Core i5-2450M 2.5GHz
  2. 6GB DDR3 Memory 2 DIMM
  3. 750 GB (7200 rpm) Hard Drive
  4. 14 inch High Definition LED Display (1366 x 768) with Truelife
  5. Adobe Elements 9.0 Photoshop and Premiere Bundle(Good for editing)
  6. Windows 7 Home Premium 64 bit(To work for Adobe Premiere Pro CS6)
  7. 14-inch screen

The reason I picked this laptop for Christmas is because it has 6GB ram memory which makes it very fast for gaming and video editing. It also has 7200 rpm hard drive speed making it compatible with Adobe Premiere Pro CS6. Of course, it was the 64-bit that made me look at it because I wouldn't by a 32-bit due to the fact that's becoming incompatible with the newest versions of Adobe.

I really recommend it because it has good screen size with great specifications especially if you are working with editing in professional editing soft wares like Adobe.

You can get this laptop on Amazon : http://www.amazon.com/Dell-Inspiron-14z-Photoshop-Bluetooth/dp/B008YWGTVU/ref=sr_1_1?s=electronics&ie=UTF8&qid=1356353935&sr=1-1&keywords=dell+core+i5+7200

How to increase a audio pitch in Adobe Premiere Pro

A lot of people like to increase a video's audio pitch to increase it's humor.
Of course many people would like to increase the speed of the video (which I showed in my last blog post)
however, there is a more professional way in which the video will not be effected but only it's audio.

First, import any video or audio and drag it into the timeline:


Then go to your effects tab , go to the search and type in : pitchshifter
Then you will see two. Click the one under stereo and drag onto the audio part of the video in the timeline which is in the audio track:


Then it will show in the effects control in the audio effects part of the video and click on the arrow next to the pitchshifter and click on Individual Parameters , click on pitch and increase it to how much you want the pitch to be. And then click on the Formantpre... button and drag it until you got it to off.

That way you can get a nice pitched video that is funny for a nice group.
For more information, leave a comment.

Saturday, December 1, 2012

Different ways of cropping in Adobe Premiere Pro

As you all know, one of the simplest ways of getting rid of unwanted detail in a video, you just use the crop button in most editing programs but there are more advanced and practical things worth trying in a specific piece of footage.

First, we are going to teach you how to do the basic cropping techniques in Adobe Premiere Pro.

First, open Adobe Premiere Pro and import and drag a video to the timeline of the project and click on the effects tab:


When you are done with that , click on the Video effects sub tab and then click on the transform and click on the crop button to drag it to the video. Then you have to click on the effects control tab of the video:


You can play with the number but there is a much easier way:

You can click on the crop button and select it and then you can play with the cropping on the sequence video:


As you can see , this is very basic cropping but there is a much better and practical way called garbage matte and it's found in the keying sub tab:


You can drag it to the effects control of the video but I recommend you take off the crop effect first not to make it look weird:

There are four types of garbage matte , there is the four point, eight point and sixteen point garbage matte. The more point you got, the more detailed the cropping will be , I will enter an eight point garbage matte into the effects control:


As you can see , there are a lot of options which are much more than the crop and the 16 point has more and 4 point has less and  you don't have to go and change the details and numbers. You can easily select it and change it on the sequence video like the crop.


That's all you need to know.
Hope you understood it perfectly.