Now, in this tutorial, we are not only going to use Adobe Premiere Pro to encode our video. We will also use Handbrake: A very simple and great converter.
Now, lets say you are done editing , and when you are done , just click on File--->export---->Media:
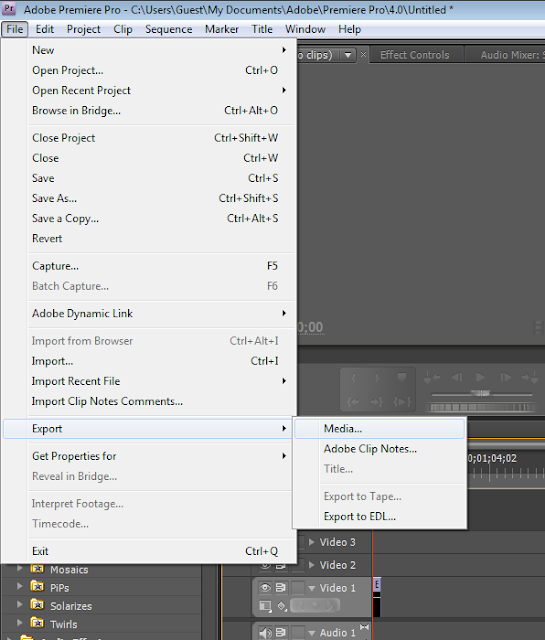
And by Media , they mean Adobe Media Encoder which comes with Adobe Premiere Pro.
And when you click on Media , in a few seconds , this window will show up:

Now , at the top of the window you have Source/Output , so click on Output. Basically, Output will give you the quality of the settings you gave, so the output is how your video will look like when you export it and source is the quality that comes from the camera you were shooting on:
Okay , now head to the right where you can tweak with your export settings :

Okay , now these are the settings that i use that produce the best quality for me. Many people would disagree but this is what i use and produces quality that is one of a kind.
So:
Format: FLV/F4V
Preset: F4V-HD 720p Flash 9.0.r115 and Higher.
Comments: Write anything you want.
Output Name: Where to save your movie and what to name it.
And remember to always to check on Export video and Export audio.
And in the Video tab:
Check on Resize video.
And the frame width : 1280
Frame Height: 720
Frame rate: 29.97
Field Order: None(Progressive)
Profile: High
Level: 4.1
And then we have the bitrate settings , which is probably the only thing that changes quality. The less the bit rate , the less the quality and file size. And the more the bitrate, the better the quality and higher the file size. The bit rate i find which is the best is :
Target Bitrate: 6 Mbps
Maximum Bitrate: 9 Mbps
And in the advanced settings , you have Set Keyframe Distance, so just uncheck that.
And i recommend not changing anything in the audio because it's already perfect.
So just click Ok.
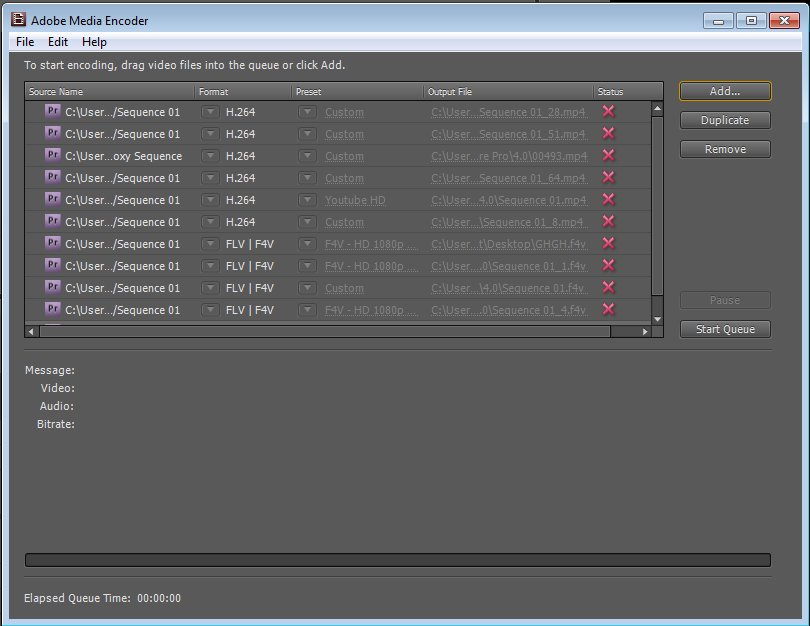
And then they will take you to Adobe Media Encoder and this window will show up:

And then just click on ''Start Queue'' , and wait for it to finish and then go to the file you saved it to.
And then open Handbrake and convert it into a smaller file size that it will be so easy to upload to youtube , and here is a tutorial for Handbrake : http://teachingyouaboutyourpc.blogspot.com/2011/12/how-to-convert-very-large-video-file.html
And that's all , for more information , contact me at Karims27@hotmail.com
Thanks for reading this blog post,
-Karim
Now, lets say you are done editing , and when you are done , just click on File--->export---->Media:

And by Media , they mean Adobe Media Encoder which comes with Adobe Premiere Pro.
And when you click on Media , in a few seconds , this window will show up:

Now , at the top of the window you have Source/Output , so click on Output. Basically, Output will give you the quality of the settings you gave, so the output is how your video will look like when you export it and source is the quality that comes from the camera you were shooting on:
| Click on Output |
Okay , now head to the right where you can tweak with your export settings :

Okay , now these are the settings that i use that produce the best quality for me. Many people would disagree but this is what i use and produces quality that is one of a kind.
So:
Format: FLV/F4V
Preset: F4V-HD 720p Flash 9.0.r115 and Higher.
Comments: Write anything you want.
Output Name: Where to save your movie and what to name it.
And remember to always to check on Export video and Export audio.
And in the Video tab:
Check on Resize video.
And the frame width : 1280
Frame Height: 720
Frame rate: 29.97
Field Order: None(Progressive)
Profile: High
Level: 4.1
And then we have the bitrate settings , which is probably the only thing that changes quality. The less the bit rate , the less the quality and file size. And the more the bitrate, the better the quality and higher the file size. The bit rate i find which is the best is :
Target Bitrate: 6 Mbps
Maximum Bitrate: 9 Mbps
And in the advanced settings , you have Set Keyframe Distance, so just uncheck that.
And i recommend not changing anything in the audio because it's already perfect.
So just click Ok.
And then they will take you to Adobe Media Encoder and this window will show up:

And then just click on ''Start Queue'' , and wait for it to finish and then go to the file you saved it to.
And then open Handbrake and convert it into a smaller file size that it will be so easy to upload to youtube , and here is a tutorial for Handbrake : http://teachingyouaboutyourpc.blogspot.com/2011/12/how-to-convert-very-large-video-file.html
And that's all , for more information , contact me at Karims27@hotmail.com
Thanks for reading this blog post,
-Karim
No comments:
Post a Comment