Sunday, November 25, 2012


Saturday, November 24, 2012
How to change or reverse video speed in Adobe Premiere Pro
Many people out there would like to make a nice and neat video showing a person talking as fast as Fred(A famous internet Youtube sensation.) or do a time-lapse related to something undergoing a change in their daily life like the growth of ones beard, hair etc..


All of these are done in a lot of editing programs and in this tutorial, I will teach you how this is done in Adobe Premiere Pro CS4 (This applies to all versions of Adobe Premiere)
First things first , you have to import your clip and drag it to the timeline:

When you play your clip , you are going to see normal speed just like you recorded it.
Playing with the speed and changing it is very simple ,
first right click on the clip inserted in the timeline and click on Speed/Duration:

When you click on this button , a small window will appear :

The changes that will be done on this clip won't apply on any other clips in the timeline , just on this specific clip.
Changes you can do:
1) The change that most editing users are most interested in is the Speed, the unit of the speed here is in % (percentages), so when we decrease the percentage ,we mean a fraction of the original speed ( in frames/sec.) and when we increase this percentage more than 100%, we mean we are increasing it by a fraction where the numerator is bigger than the denominator. I would like to mention this extra information just in case your want every single bit of info., Simply, as the percentage increases , the speed will increase thus giving fast motion and as it decreases, the speed will decrease thus giving slow motion.
2) Another change is the duration which is the same as the speed because as the duration decreases, the speed increases but when the user chooses duration , he specifies how much he wants the time to be if he wanted a video with a restricted duration.
4) Reversing makes it go backwards from end to beginning.
3) You can maintain the same pitch even though you increase speed because when you increase speed , pitch is automatically raised.
4) Then we have the Ripple Edit; Shifting trailing clips option and this is mostly done for animation. For instance , get a group of drawings where each one has a small difference from the other , drag them to the timeline and select them both and click on Speed/Duration , if you check "Ripple Edit; Shifting trailing clips" option, and choose a duration , then this will make both images having that specific duration together. For animation , type in a small duration.
This is all about Speed in Adobe Premiere Pro.
I hope this helped you .
If you need more information, ask me on my email: Karims27@hotmail.com
Saturday, July 7, 2012
Saturday, June 30, 2012
I made a new video everybody.
The video is about Charlie Sheen and Google Nexus 7 Tablet.
The link is here: http://youtu.be/28MoewyY_NQ
The link is here: http://youtu.be/28MoewyY_NQ
Friday, June 29, 2012
How to make a NICE gradient in Adobe Premiere Pro
Lets say you want to make a nice colorful background to replace the green in your green screen footage or picture. Well what you have to do is add a gradient.


First you have to get a black footage:
Now when you click the button , click then Black video. And then you get this :

Now choose the setting according to your video settings.
And then you would have a black footage which you should drag to your timeline in the first video track:

Then go to your effects and go to video effects and go to "Generate" and then a four-color gradient effect will show up so drag to the effects control of the black footage you inserted earlier:
And then you would have a nice gradient :
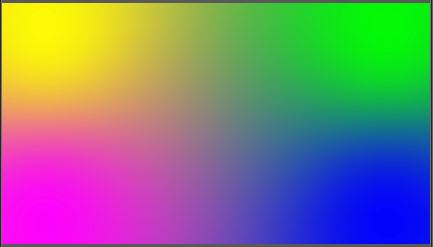
But lets say you want to adjust the colors so you have to pick positions and colors in the effects control so you should get this:
Now all you have to do is adjust the color positions and the colors themselves.
Now to let a green screen footage have this background go to this link on how to color key: http://teachingyouaboutyourpc.blogspot.com/2012/01/how-to-green-screen-in-adobe-premiere.html
Thank you for reading and i hope you found this helpful and for information contact me at my email: Karims27@hotmail.com
Thanks,
Karim
Sunday, June 24, 2012
Saturday, June 16, 2012
How to Color Correct in Adobe Premiere Pro
Today I am going to teach you how to color correct. The whole purpose of color correcting is to bring our pictures or our videos some life or in this case color.
There are a lot of color correcting effects however the one I prefer is The Fast Color Corrector.
Now , first open Adobe Premiere Pro and import your photo or video:

Now go to the effects section:

Go to the video effects and go to Color Correction and then choose fast color corrector and then drag it to the effects panel if your life-less video or photo after dragging it to the timeline:

I will now instruct my opinions on what to adjust:
1. First add the color you want a little close to blue:

2.Then adjust the input levels according to what I am showing you and don't adjust the output levels:

3. Then increase the saturation from 100 to 150 :

Then this is the difference:
Before:

After:

As you see the color has changed a lot and it gave some life to the picture.
Thank you for reading and for more information , email me at karims27@hotmail.com
There are a lot of color correcting effects however the one I prefer is The Fast Color Corrector.
Now , first open Adobe Premiere Pro and import your photo or video:

Now go to the effects section:

Go to the video effects and go to Color Correction and then choose fast color corrector and then drag it to the effects panel if your life-less video or photo after dragging it to the timeline:

I will now instruct my opinions on what to adjust:
1. First add the color you want a little close to blue:

2.Then adjust the input levels according to what I am showing you and don't adjust the output levels:

3. Then increase the saturation from 100 to 150 :

Then this is the difference:
Before:

After:

As you see the color has changed a lot and it gave some life to the picture.
Thank you for reading and for more information , email me at karims27@hotmail.com
Tuesday, April 10, 2012
Smartest person in the world!
Did anybody know that the smartest person in the world -Kim Ung-yong has an IQ of 210 and started college when he was 4 .. and started to talk various foreign languages when he was 2..This brilliant genius is my hero for his brains.
Monday, January 30, 2012
How to green screen in Adobe Premiere Pro.
Have you ever wanted to show that you have been in space but you really haven't?
Well , the best way to do that is stand in front of a green screen and take out that green and replace it with any image you want.
So first , import your footage and drag it onto your timeline :

Select it and then click on the Effects--->video effects-----> and key----> chroma key and drag it to the effect controls and then expand it and this is what will show up in the effects control :

Now click on the color picker next to the ''Color'' tab and then click on the green on the green screen and this will show up :

And then expand the ''Similarity'' tab and this will show up :

And then it will become all black and then drag the footage up to the ''Video 2'' layer on the timeline and add an image or a video to the ''Video 1'' layer on the timeline as a replacement to the footage of where you were standing on in front of your green screen like this :

And then , you will get this as a result:

Remember to always light your green screen perfectly.
For more information , contact me at Karims27@hotmail.com
Thank you so much for reading
Well , the best way to do that is stand in front of a green screen and take out that green and replace it with any image you want.
So first , import your footage and drag it onto your timeline :

Select it and then click on the Effects--->video effects-----> and key----> chroma key and drag it to the effect controls and then expand it and this is what will show up in the effects control :

Now click on the color picker next to the ''Color'' tab and then click on the green on the green screen and this will show up :

And then expand the ''Similarity'' tab and this will show up :

And then it will become all black and then drag the footage up to the ''Video 2'' layer on the timeline and add an image or a video to the ''Video 1'' layer on the timeline as a replacement to the footage of where you were standing on in front of your green screen like this :
And then , you will get this as a result:

Remember to always light your green screen perfectly.
For more information , contact me at Karims27@hotmail.com
Thank you so much for reading
Wednesday, January 4, 2012
How to key framing in Adobe Premiere Pro.
Now , motion tracking is similar to animating but animating is a little more complex, it's like bringing a cartoon to life. Motion Tracking is just making an image or text or video ... move around the screen. Kinda of like those screen savers. Now you can do this easily in Adobe Premiere Pro , and i will show you how.
Now , first you have to have footage or an image or text in the timeline, i will show you with image:

Now when it's in the timeline, click on the footage, look above in the first screen player , you will see a tab called Effects Controls:

Now , in the effects controls , you have motion , opacity ,... and all the effects you add to the footage and this is the most important part for people that are using color correction and all those effects in adobe premiere pro. And in this tab , you tweak with the effects.
So , lets get back to Motion:

Now in the motion tab , you have some tools next to the title ''Motion'' which we have to go through first.
Now , you have the reset button:

Now , when you click on this , all the settings you made for the motion on this footage will be erased, so if you made a huge mistake that can change the whole project because of the motion of this footage , you don't have to reset your self by changing back the numbers , all you have to do is press the reset button.
Then you have the little fx button which is similar to the reset button but a little different. When you made some settings in the motion and you want to see how it looked before you changed anything , just click on the fx and it'll disappear and they will show you how it looked before you changed the numbers in the motion and then you can easily click back on the empty box which held the fx button to back to your settings.
Now the fx and reset button are not only made for the ''Motion'' effect but also for every effect you add to your footage.
Okay , before motion tracking, i will show you each and every component in the motion tab which include : Position , scale , Rotation, Anchor Point.
Now, the position is just where you want the footage or image to be on the screen and you can change the position by tweaking with the numbers or you can just easily click on the footage on the second screen and move it around :

so when you click it just keep your mouse pressed on it and drag it around.
And then you have the scale which is easily how big you want your footage to be shown on the screen ( Note: the scale is like digital zoom so it'll decrease quality).
And to increase the scale . all you have to do is click on any corner of the footage on the screen and drag it up or you can just increase the number in the effects control tab and vice versa for decreasing it.
Then you have the rotation which is very simple , to change the rotation degree , just adjust it in effects controls tab or on the screen.
And then you have the anchor point which i can't find any difference with the position so just control it like you control the position of your image.
Now that we are done with tweaking with the effects , you may want to motion track . For example letting the the image move from left to right on the second screen.
And to do this you are going to have to use the key frames next to each effect::

So , move to a specific time in the timeline where you want the motion tracking to start , and then when you click on that key frame button , a key frame will show up in the effects timeline :

Now , then , move to a specific time in the timeline where you want the motion tracking to stop and change the settings of that specific effect and click on this button:

Now , first you have to have footage or an image or text in the timeline, i will show you with image:

Now when it's in the timeline, click on the footage, look above in the first screen player , you will see a tab called Effects Controls:
Now , in the effects controls , you have motion , opacity ,... and all the effects you add to the footage and this is the most important part for people that are using color correction and all those effects in adobe premiere pro. And in this tab , you tweak with the effects.
So , lets get back to Motion:

Now in the motion tab , you have some tools next to the title ''Motion'' which we have to go through first.
Now , you have the reset button:
Now , when you click on this , all the settings you made for the motion on this footage will be erased, so if you made a huge mistake that can change the whole project because of the motion of this footage , you don't have to reset your self by changing back the numbers , all you have to do is press the reset button.
Then you have the little fx button which is similar to the reset button but a little different. When you made some settings in the motion and you want to see how it looked before you changed anything , just click on the fx and it'll disappear and they will show you how it looked before you changed the numbers in the motion and then you can easily click back on the empty box which held the fx button to back to your settings.
Now the fx and reset button are not only made for the ''Motion'' effect but also for every effect you add to your footage.
Okay , before motion tracking, i will show you each and every component in the motion tab which include : Position , scale , Rotation, Anchor Point.
Now, the position is just where you want the footage or image to be on the screen and you can change the position by tweaking with the numbers or you can just easily click on the footage on the second screen and move it around :

so when you click it just keep your mouse pressed on it and drag it around.
And then you have the scale which is easily how big you want your footage to be shown on the screen ( Note: the scale is like digital zoom so it'll decrease quality).
And to increase the scale . all you have to do is click on any corner of the footage on the screen and drag it up or you can just increase the number in the effects control tab and vice versa for decreasing it.
Then you have the rotation which is very simple , to change the rotation degree , just adjust it in effects controls tab or on the screen.
And then you have the anchor point which i can't find any difference with the position so just control it like you control the position of your image.
Now that we are done with tweaking with the effects , you may want to motion track . For example letting the the image move from left to right on the second screen.
And to do this you are going to have to use the key frames next to each effect::
So , move to a specific time in the timeline where you want the motion tracking to start , and then when you click on that key frame button , a key frame will show up in the effects timeline :
Now , then , move to a specific time in the timeline where you want the motion tracking to stop and change the settings of that specific effect and click on this button:
and then when you click it , you will have 2 key frames in the effects timeline so then view your footage after you did all the instructions above , and you will notice a basic and clear animation .
And that's it , for more information , contact me at Karims27@hotmail.com
Thank you for reading this blog post,
-Karim
Sunday, January 1, 2012
Saturday, December 31, 2011
How to make text in Adobe Premiere Pro.
Now, i once taught you how to make text in windows movie maker but when you do it in Adobe Premiere Pro , It'll be magical, because there are so many features on making text in it.
First, open your project:

Now click on Title at the top:

And then they will give you a few options so click on the first one that says ''New Title''----> ''Default Still''
And then this will show up:

Now , lets start with the title tools at the top left corner of the window:

Now , you have the black square at the top which has the arrow in it , now this arrow is used to move text , so you don't need to use it before you make text.
And now next to it is the yellow square which has the rotational tool in it , like the arrow, it has no use before you make the text.
Now, you have the white square with the most important tool in it. And to make the title just click on this T button and click on the title preview :

Now just type in what you want, and you can use the arrow to move it around and the rotational tool to rotate it.
Now , lets go back to the tools:
And then you have pink square with the title with the Downwards arrow on it, now with this you can type title downwards.
And then you have the white circle with the text box, now you click on the text box and then click on the text preview , and then you type text in the box , and you can click on the arrow at the top to expand the box.
And you can also use the downwards text box in the pink box which is the same like the text box but downwards. And you can also expand and move it with the arrow.
And then you have the oblique text in the green and blue circle, and with this tool , you can mask a text box in your way , now to do this just click on the tool and click on the preview text , and then it'll show a point on it and then click on another place on the preview and it'll show a line joining these points and then you can keep on creating points and then joining them all together to make a weird shape box where you can type text in and it'll look very odd but cool.
And then you have the tools right below it :
You have the masking tool in the blue circle , and with it you can do exactly what those oblique texts can do and the masking tool with the negative sign right above it , is used to remove masking points and the masking tool with the positive sign right above is used to expand and change the shape of the line joining two masking points and the tool in the light green circle is used to expand a line in the circle.
And then you have the shapes which is very simple , all you have to do is click on a specific shape and then click on the text preview and easily expand it.
Now when you make a title and select it , you are able to change the font by looking above where you have a number of fonts and you can also make it bold , italic , bold italic .... And you also have the font size right next to the font box and you also have the Kerning which allows you to make spaces between the characters of the title you wrote. And you also have the alignment which can be center , left , right , justify ....
And then you have the title styles which is the funnest part , now each title style has it's own font , color , font size,aspect... and you can add a specific title style by just selecting the title you wrote and click on the style.
And then you have Title Properties which include Transform ,Properties, Fill (Fill with color) , and strokes.
Now , in the transform , you have opacity for the title , and the x position and y position , now this means moving it right and left which you can easily do so with the arrow tool . And then you have the width which is simply how much you want its width to be and how wide you want it to be which you can also do with the arrow tool. And then you have the height where you can change the height for the text or how tall it is and you can also use the arrow tool for this. And then you have the rotation which is just easily rotating the text which you can do with the rotational tool right next to the arrow tool.
Then you have the Properties which includes the font family which is basically the font of the title. And the font style which is bold , italic.... And you also have the font size , and the aspect which is basically the same as the width. And then you have the kerning which is how much space you want between the characters of the title you wrote. And then you have the tracking which is the opp. of kerning. And then you have the basic shift which if you are writing a paragraph, will let you make space between the lines of in it. And then you have the slant , and it's easily how oblique or italic you want your title to be . And then you have the small caps , which you can check if you want your title to be fully capital.
And then you have the distort which is used to change the way the text is written.
And then you have the fill and in it you have the fill type, which can be solid or linear gradient and the Radial Gradient ( Mixing 2 colors ) and the 4 color gradient ( mixing 4 colors) ..... Now you have the color , which is basically the color of the fill and the opacity which is the fill opacity.
And then you have the Strokes which is inner strokes and outer strokes and strokes are like title outlines. And then you have the shadow which is easily just adding a shadow to your title.
And when you are done editing your title , just exit it by clicking on the x button ,and it'll show up in the project , and you can easily just drag it into the timeline.
And this is just the basics and the most important , if you want me to go more into details next time, just contact me at Karims27@hotmail.com
Thanks for reading this blog post
-Karim
First, open your project:

Now click on Title at the top:

And then they will give you a few options so click on the first one that says ''New Title''----> ''Default Still''
And then this will show up:

Now , lets start with the title tools at the top left corner of the window:

Now , you have the black square at the top which has the arrow in it , now this arrow is used to move text , so you don't need to use it before you make text.
And now next to it is the yellow square which has the rotational tool in it , like the arrow, it has no use before you make the text.
Now, you have the white square with the most important tool in it. And to make the title just click on this T button and click on the title preview :

Now just type in what you want, and you can use the arrow to move it around and the rotational tool to rotate it.
Now , lets go back to the tools:
And then you have pink square with the title with the Downwards arrow on it, now with this you can type title downwards.
And then you have the white circle with the text box, now you click on the text box and then click on the text preview , and then you type text in the box , and you can click on the arrow at the top to expand the box.
And you can also use the downwards text box in the pink box which is the same like the text box but downwards. And you can also expand and move it with the arrow.
And then you have the oblique text in the green and blue circle, and with this tool , you can mask a text box in your way , now to do this just click on the tool and click on the preview text , and then it'll show a point on it and then click on another place on the preview and it'll show a line joining these points and then you can keep on creating points and then joining them all together to make a weird shape box where you can type text in and it'll look very odd but cool.
And then you have the tools right below it :
You have the masking tool in the blue circle , and with it you can do exactly what those oblique texts can do and the masking tool with the negative sign right above it , is used to remove masking points and the masking tool with the positive sign right above is used to expand and change the shape of the line joining two masking points and the tool in the light green circle is used to expand a line in the circle.
And then you have the shapes which is very simple , all you have to do is click on a specific shape and then click on the text preview and easily expand it.
Now when you make a title and select it , you are able to change the font by looking above where you have a number of fonts and you can also make it bold , italic , bold italic .... And you also have the font size right next to the font box and you also have the Kerning which allows you to make spaces between the characters of the title you wrote. And you also have the alignment which can be center , left , right , justify ....
And then you have the title styles which is the funnest part , now each title style has it's own font , color , font size,aspect... and you can add a specific title style by just selecting the title you wrote and click on the style.
And then you have Title Properties which include Transform ,Properties, Fill (Fill with color) , and strokes.
Now , in the transform , you have opacity for the title , and the x position and y position , now this means moving it right and left which you can easily do so with the arrow tool . And then you have the width which is simply how much you want its width to be and how wide you want it to be which you can also do with the arrow tool. And then you have the height where you can change the height for the text or how tall it is and you can also use the arrow tool for this. And then you have the rotation which is just easily rotating the text which you can do with the rotational tool right next to the arrow tool.
Then you have the Properties which includes the font family which is basically the font of the title. And the font style which is bold , italic.... And you also have the font size , and the aspect which is basically the same as the width. And then you have the kerning which is how much space you want between the characters of the title you wrote. And then you have the tracking which is the opp. of kerning. And then you have the basic shift which if you are writing a paragraph, will let you make space between the lines of in it. And then you have the slant , and it's easily how oblique or italic you want your title to be . And then you have the small caps , which you can check if you want your title to be fully capital.
And then you have the distort which is used to change the way the text is written.
And then you have the fill and in it you have the fill type, which can be solid or linear gradient and the Radial Gradient ( Mixing 2 colors ) and the 4 color gradient ( mixing 4 colors) ..... Now you have the color , which is basically the color of the fill and the opacity which is the fill opacity.
And then you have the Strokes which is inner strokes and outer strokes and strokes are like title outlines. And then you have the shadow which is easily just adding a shadow to your title.
And when you are done editing your title , just exit it by clicking on the x button ,and it'll show up in the project , and you can easily just drag it into the timeline.
And this is just the basics and the most important , if you want me to go more into details next time, just contact me at Karims27@hotmail.com
Thanks for reading this blog post
-Karim
Friday, December 30, 2011
How to cut your footage in Adobe Premiere Pro CS4!
Now , the whole point of an editing program is to cut your footage into parts and remove the bad parts and keep the good parts.
Now , the first thing you should do is import your footage , now first go to Adobe Premiere Pro , click file , import , or you can just right click on the Project and click import :

Now , just click import and choose your footage and then it'll show up here :

Now , there will also be a preview at the top with the video frame rate and resolution.
Now , as you see , there are 2 screens in adobe premiere pro , now if you double click on your footage it will show up in the first screen which you can edit in:

Now in the first screen , you can choose in points and out points for your video , that means where your video starts and ends . Now , to make an in point , make sure to select the first screen , until there is a thin orange line on it:

So , yeah when you select it , You can drag that little blue point so you can play your footage, now to choose an in point , just drag the blue point to the part of the footage where you want it to start and click on I on your keyboard , and this is how it will look:

And then , you can drag the blue point to where you want to end your footage press on O on your keyboard , and this is how it will look like :

And then , to drag it to the timeline , just press that button which i drew a circle around.
and then it'll show up in the timeline and in the second screen like this:

You can import more footage and make an in point and out point for it and then put it next to the first footage and that's it.
You can also cut footage buy using the cutting tools in the corner :

Remember for more information , contact me at Karims27@hotmail.com
Thank you for reading this post
-Karim
Now , the first thing you should do is import your footage , now first go to Adobe Premiere Pro , click file , import , or you can just right click on the Project and click import :

Now , just click import and choose your footage and then it'll show up here :

Now , there will also be a preview at the top with the video frame rate and resolution.
Now , as you see , there are 2 screens in adobe premiere pro , now if you double click on your footage it will show up in the first screen which you can edit in:

Now in the first screen , you can choose in points and out points for your video , that means where your video starts and ends . Now , to make an in point , make sure to select the first screen , until there is a thin orange line on it:

So , yeah when you select it , You can drag that little blue point so you can play your footage, now to choose an in point , just drag the blue point to the part of the footage where you want it to start and click on I on your keyboard , and this is how it will look:

And then , you can drag the blue point to where you want to end your footage press on O on your keyboard , and this is how it will look like :

And then , to drag it to the timeline , just press that button which i drew a circle around.
and then it'll show up in the timeline and in the second screen like this:

You can import more footage and make an in point and out point for it and then put it next to the first footage and that's it.
You can also cut footage buy using the cutting tools in the corner :

Remember for more information , contact me at Karims27@hotmail.com
Thank you for reading this post
-Karim
Subscribe to:
Posts (Atom)